Making a handmade photo frame can be a fun and creative project that allows you to display your favorite photos in a unique and personalized way. Here’s a step-by-step guide on how to make a handmade photo frame:
Materials:
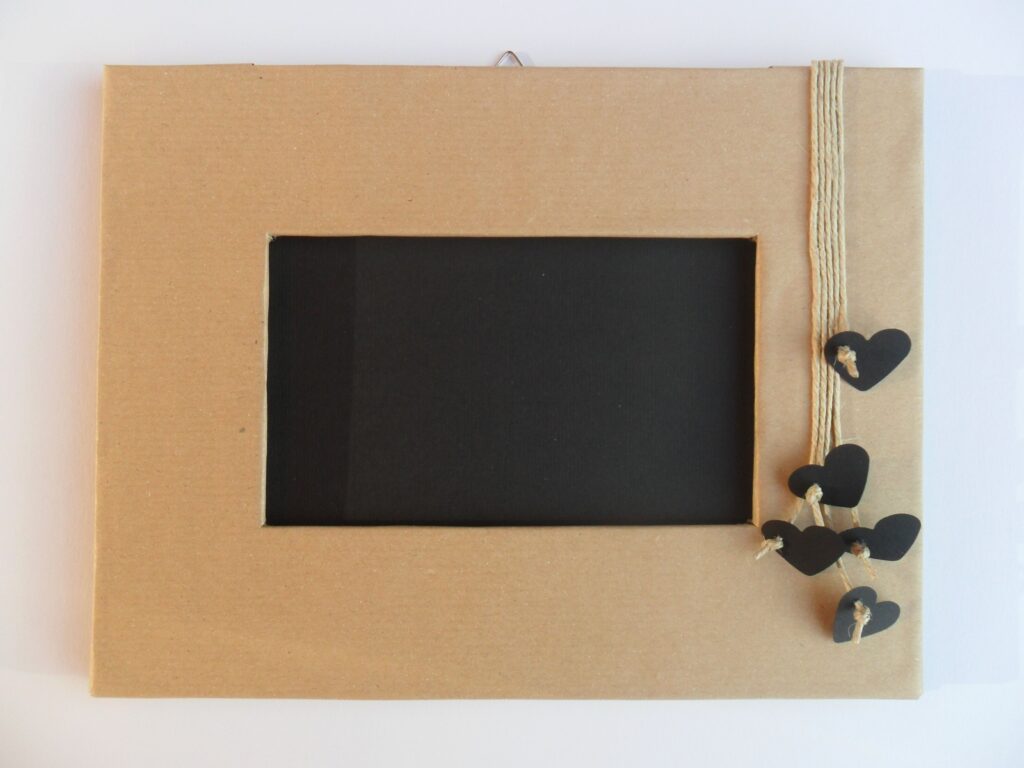
Picture frame, either store-bought or a thrifted frame that you want to upcycle
Cardboard or chipboard
Craft paper or fabric for covering the cardboard or chipboard
Decorative paper, fabric, ribbon, or other embellishments
Scissors or craft knife
Adhesive (such as glue or double-sided tape)
Ruler or measuring tape
Pencil or pen
Optional: paint, brushes, and other painting supplies (if you want to paint the frame)
Step 1: Choose Your Frame and Prepare Your Materials
Choose a picture frame that fits the size of the photo you want to display, or a frame that you want to upcycle. Gather your materials, including cardboard or chipboard for the backing, craft paper or fabric for covering the cardboard or chipboard, and any decorative elements you want to use for embellishment.
Step 2: Measure and Cut the Backing
Using a ruler or measuring tape, measure the size of the cardboard or chipboard needed to fit inside the frame as the backing. Mark the measurements on the cardboard or chipboard with a pencil or pen, and cut it out using scissors or a craft knife. Make sure the backing is slightly smaller than the frame so that it fits inside without overlapping the edges.
Step 3: Cover the Backing with Craft Paper or Fabric
Cut a piece of craft paper or fabric slightly larger than the cardboard or chipboard backing. Place the backing on top of the craft paper or fabric, and wrap the edges of the paper or fabric around the cardboard or chipboard, securing it with adhesive (such as glue or double-sided tape) on the back. Trim off any excess paper or fabric, making sure the edges are neat and clean.
Step 4: Decorate the Frame
If desired, you can paint the frame to match your chosen design or leave it as is if you like the original finish. If you choose to paint the frame, apply paint using brushes or other painting supplies, and allow it to dry completely before proceeding to the next step.
Step 5: Attach the Backing to the Frame
Place the covered cardboard or chipboard backing inside the frame, and use adhesive (such as glue or double-sided tape) to secure it in place. Make sure it is centered and straight within the frame.
Step 6: Add Decorative Embellishments
Now it’s time to get creative and add any decorative elements you desire. You can use decorative paper, fabric, ribbon, or other embellishments to further customize your photo frame. Use adhesive to attach the embellishments to the frame, being careful to align them and secure them firmly.
Step 7: Insert Your Photo
Finally, carefully insert your photo into the frame behind the cardboard or chipboard backing. Make sure it fits properly and is centered within the frame.
And there you have it! Your handmade photo frame is now complete. Display it on a tabletop, hang it on a wall, or give it as a thoughtful gift. It’s a great way to showcase your cherished memories and add a personal touch to your home decor.